Create a thumb toplist
We'll be using three fictitious trades (http://www.yourtrade1.com/, http://www.yourtrade2.com/ and http://www.yourtrade1.com/) for the purpose of this tutorial. If your database is empty at this stage, add three of your trades. If your database includes more than three trades, your results will differ from ours.
Since thumb toplist gets much more attention than the ordinary text toplist, we should try to create one:
1. Download thumbs
The first thing you need are images. TE3 can automatically grab images from your trades and crop them to preferred size. Navigate to the Toplist / Thumb grabber menu.
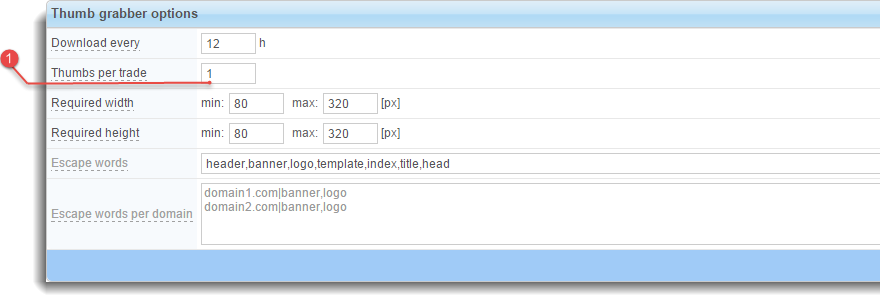
“Thumb grabber” module can be set to crawl trades in your database every x hours and to automatically download a specified amount of thumbs from trader's website. We are going to trigger “Thumb grabber” manually:
Step by step
 You can normally download as many thumbs per trade as you want, but we only need one thumb right now - set
 Thumbs per trade to 1 and click  .
.
 TE3 can only download thumbs (manually or automatically), if at least one “Thumb crops” condition is set! Click
  icon, specify conditions for cropping (
Width, Height and Quality are required) and click  .
.

 After you have specified how many thumbs per trade you want to download and how you want them cropped, click
  to start the process.

 To view and manage images downloaded by the “Thumb grabber”, navigate to Toplist / Images menu:
 In this menu you can manage all “Images” for all trades from a single page. Simply place your mouse pointer over
  icon to view an individual thumb.
2. Create a thumb toplist template
TE3 toplist module can build toplists from your trades database, based on a template file and the first thing you need to do is to build a toplist template using TE3 template tags.
TE3 template tags allow you to create completely unique toplists, but for the purpose of this tutorial use the example template we've prepared below:
<table style="width:100%">
 <tr>

  <td style="width:400px;text-align:center;vertical-align:top">
   <h3>##desc:1##</h3>
   <a href="/te3/out.php?id=##domain:1##">
   <img src="##img:1##" style="align:right;width:150px;height:150px;border:0">
   </a>
  </td>

  <td style="width:400px;text-align:center;vertical-align:top">
   <h3>##desc:2##</h3>
   <a href="/te3/out.php?id=##domain:2##">
   <img src="##img:2##" style="width:150px;height:150px;border:0">
   </a>
  </td>

  <td style="width:400px;text-align:center;vertical-align:top">
   <h3>##desc:3##</h3>
   <a href="/te3/out.php?id=##domain:3##">
   <img src="##img:3##" style="width:150px;height:150px;border:0">
   </a>
  </td>

 </tr>
</table>

</body>
</html>
3. Add new toplist
Once you have created a toplist template, you have to add it to yor TE3.
Step by step
Open “Add new” window
Navigate to the Toplist / Templates menu, click on the 
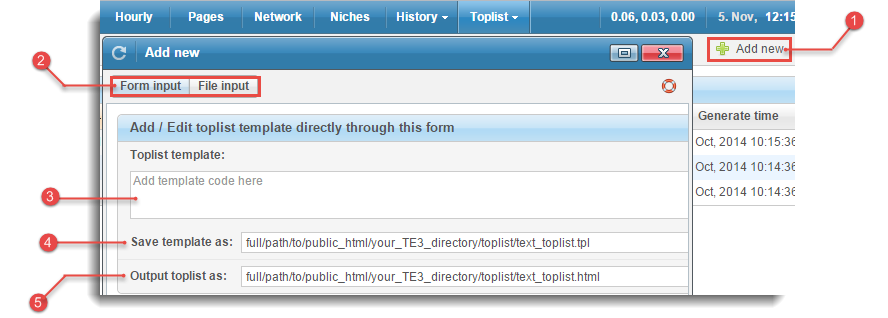
Add new button and open “Add new” pop-up window.
Select input method
You can choose between two different input methods, we'll test “Form input” method in this tutorial.
Add toplist template
Now you have to add a toplist template into the textarea (if you use “File input” method, it is assumed, you have already uploaded your template at this stage). Copy-paste the example template we've prepared above.
Save template as
Specify where would you like to save your template e.g., /full/path/to/public_html/your_TE3_directory/toplist/something.tpl
(this is a toplist file with template tags)
 Output toplist as
Next, you have to enter File output path, e.g., /full/path/to/public_html/your_TE3_directory/toplist/something.html
(this is an output file - template tags get replaced with real values)
 Save toplist
Click button in the bottom right corner.
4. Preview and edit the toplist
The new toplist is already added to the “Existing” table.

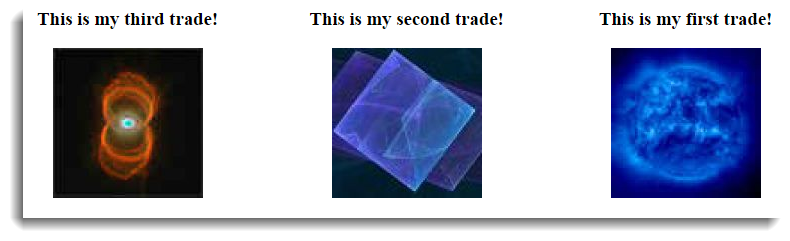
Close “Add new” window and click  icon to see the
 Preview of what the toplist will look like. Ours looks like this:
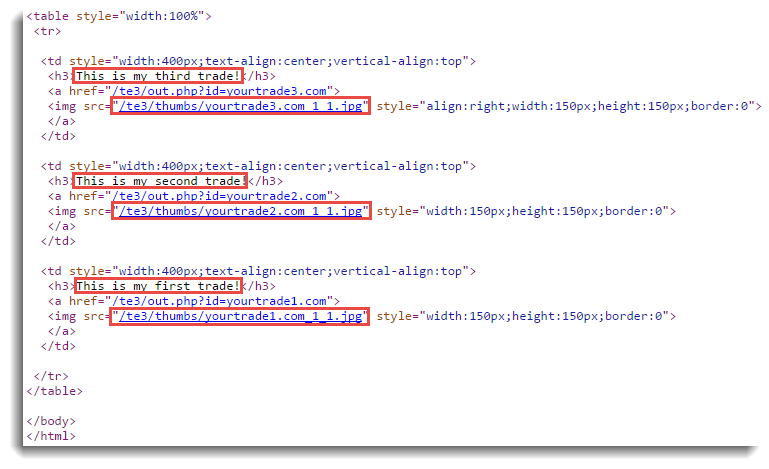
Take a look at html source for our output. You can see that TE3 template tags were replaced with real values - description tags ##desc:x## were replaced with your descriptions, image tags ##img:x## were replaced with thumbs downloaded by “Thumb grabber” and thumbs also serve as links to your trades:
You can easily edit your toplist and test its output - click ![]()
Edit icon for the respective toplist, then your changes, and click to Preview the toplist again.
5. Include toplist into your web page
After you have created and added a toplist, it has to be included into your web page!
Related topics
- Toplist templates - view toplist template syntax, learn how to add and manage toplists
- Toplist images - learn how to manage your images