Interface manager
Interface is a customized selection of data columns displayed in the Stats table. TE3 “Interface manager” enables you to create various interfaces corresponding to your traffic trading actions, switch between them with just one click, or edit them at any time.
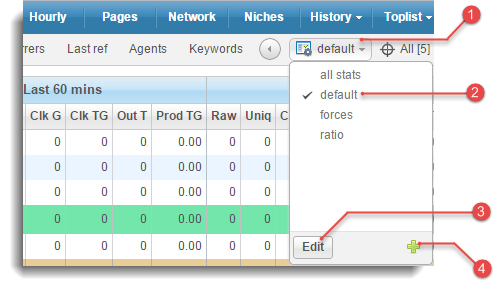
 Open “interface manager” drop-down menu
 Switch between interfaces
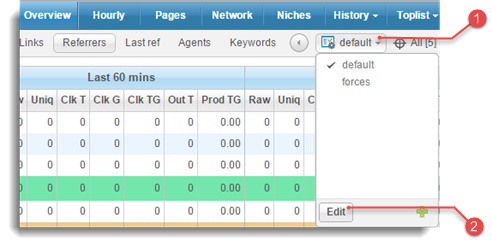
 Edit interfaces
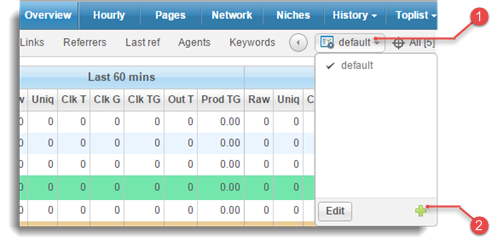
 Add new interfaces
You can create and display interfaces in the following menus: Overview, Pages, Network and Settings / Sign-up page / Webmaster statistics.
Select interface
Click on the 
Interfaces button to open the “Interface manager drop-down”. Select the inteface you wish to survey, click on it and it will be loaded into the stats table. Selected interface is stored into a cookie. Next time you open this menu, last selected interface will be automatically displayed.
We have pre-added a “Default” interface with stats for basic traffic trading actions. Although you can edit it, we advise you to create new interfaces and experiment with the settings you prefer.
Add new interfaces
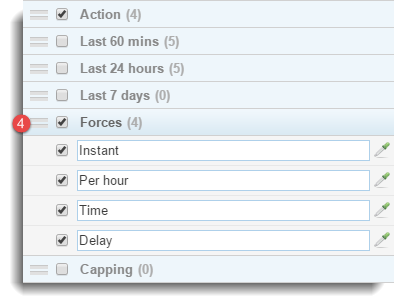
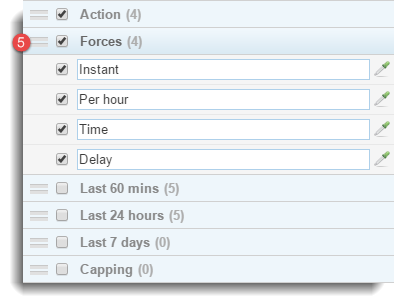
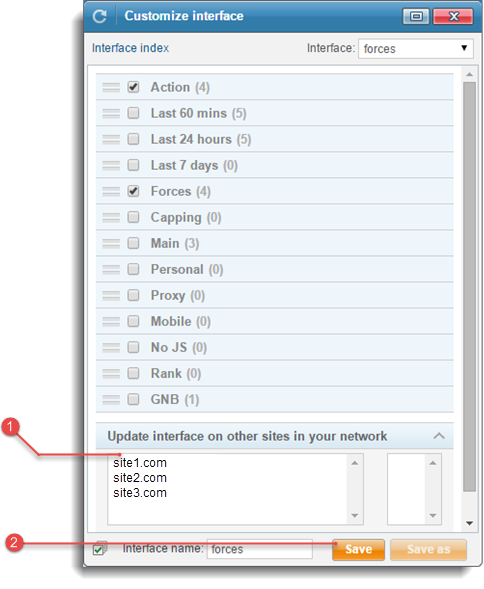
Click  icon in the footer and open a “Customize interface” window. Available parameters are sorted into 12 expandable sections - enable a preferred parameter by
 check boxing it and it will be displayed as a column of data in the stats table (if you check box a section, you enable every parameter in the section).
A new interface already has default parameters enabled, but you can disable them, enable those you prefer and completely modify it to suit your needs:
- reposition all sections and parameters - simply drag them up and down and change column order.
- rename the enabled parameters - to view original column name, hold mouse over the
input fieldand it will appear in the tooltip. - further customize your intefaces by setting a desired colour for each individual column.

 Click
Click  or press
 Edit existing interfaces
Click Edit button in the footer of “Interface manager”, then click 
Edit interface icon for the respective interface and open “Customize interface” window. To confirm your settings, click Save as. If you wish to save your modifications as a new interface, enter an Interface name and click Save.


Example: Set color for individual columns
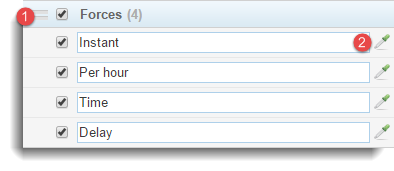
 icon to open the “Color selector”. Let's set color for
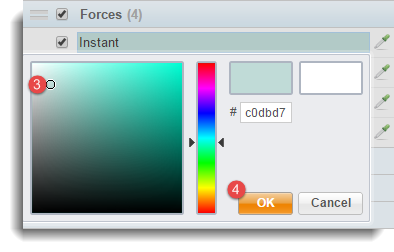
 to set the color and
Delete existing interfaces
Click  button in the footer, then click
Delete icon for the respective interface.
Network
Network sync function allows you to copy interface to the other sites in your network. To proceed, select sites from the multiple select box and click Save button. If interface with the same name already exists on some sites in your network, it will be overwritten.
Related topics
User manual: Available parameters